Gamepad for retro computers
If you are searching for an Atari compatible joystick for your classic computer you have plenty of options at your hands. If you on the other hand, are looking for a gamepad—you are pretty limited in your options.
Available or not, I really wanted a good gamepad to use with my Commodore 64.
Joysticks vs gamepads
One thing that I really can't get through my head is why joysticks continued to be the main game controller type for these computers for such a long time after NES and SEGA Master System entered the scene. A gamepad is in my opinion superior to a joystick in all aspects; they are more responsive, have better ergonomics and are cheaper to produce.
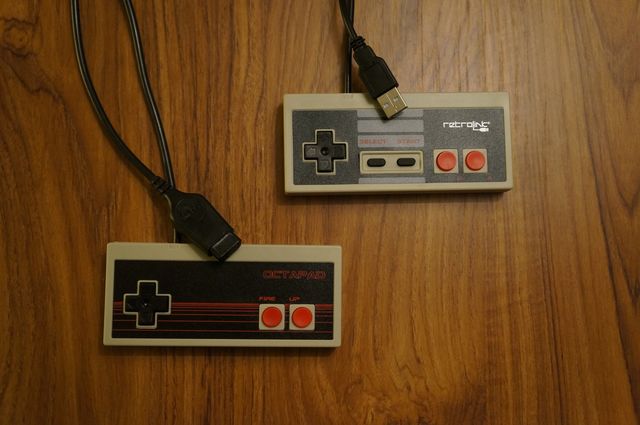
Existing gamepads
My first thought was simply to get my hands on a new Sega Genesis controller. But I have learnt that they might do damage to the computer when connected to a Commodore 64.
I was however able to find another gamepad currently in producion—namely the Matt Boomerang, whereupon I ordered one. Sadly this gamepad is a complete piece of crap. It has a totally cheap, light and flimsy feeling to it. On mine two directions on the D-pad made a harsh type of sound when pressed while the other two where pretty silent and had a more tactile feel to them. The three buttons on the left all function as fire. One of them has a (bad) physical lock and all buttons are ridiculously tall. Don't buy this.
DIY time
It was time to take the matter in my own hands. The idea was to buy an USB gamepad and make it Atari compatible.
I really like the NES controller. It does not have a ton of buttons, it feels nice and it is from roughly the same time period as the Commodore 64. I used it alot as a kid—this is the controller I want to modify.
As I don't want to trash any of my existing NES controllers and the fact that it is nice to have a new one, I started to look for brand new USB gamepads. I found one called RetroLink wich really looks and feels like the real thing. The plastic is a bit less blueish and more of a redish gray, wich I view as a good thing—it is going to blend in better with the rest of my Commodore 64 gear compared to an original NES controller.
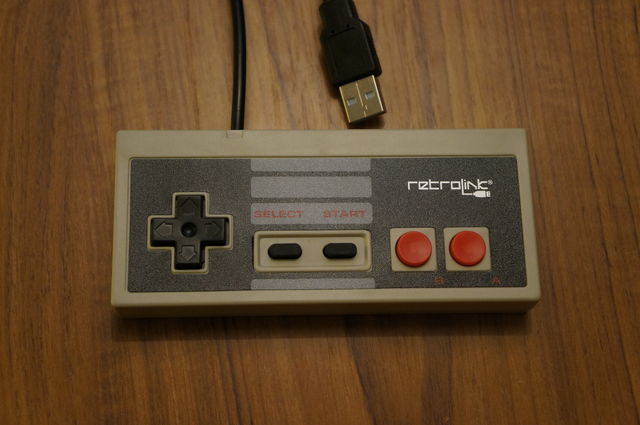
Modifications to the case
Because the NES controller has four buttons besides the D-pad, three of them won't have any function by default. One thing that I find annoying playing games on the C64 is sideways control when the stick simultaneously must be used to perform jumps. The control becomes less accurate that way and my plan to remedy this is to give button B on the NES controller the same function as up on the D-pad. As the buttons Select and Start doesn't have any functions in this scenario, I want to get rid of them.
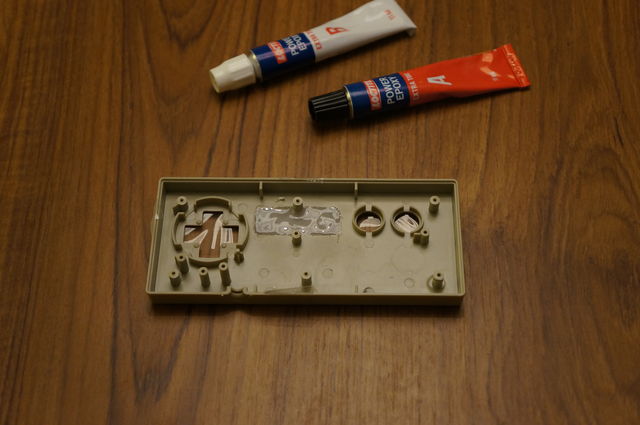
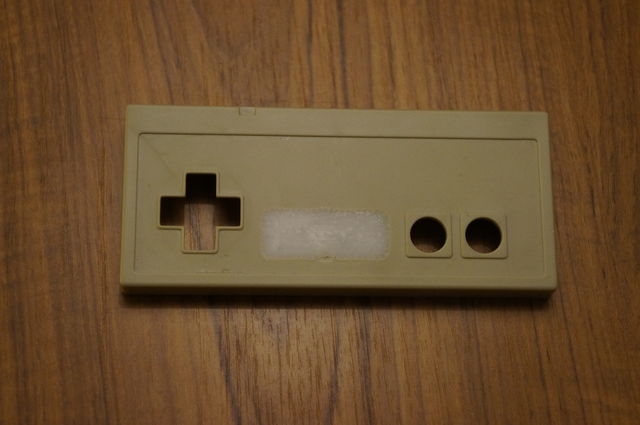
To remove the section around the unwanted Select and Start buttons, I used a small hand drill to make a perforarion around the section surrounding the buttons. It is easy to cut out the part with the perforation in place.
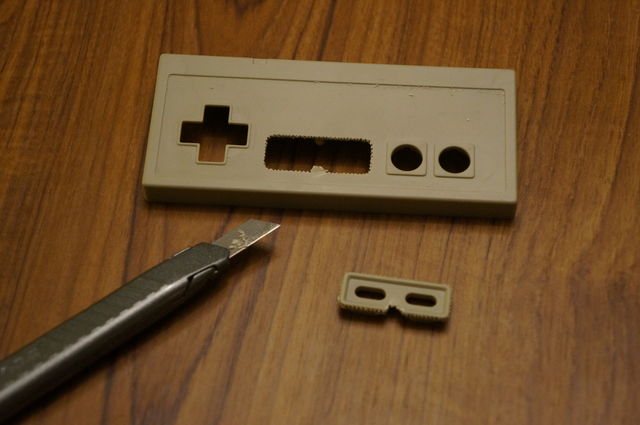
To fill the remaining hole in the controller case I used regular epoxy glue. I first taped a piece of acrylic with the side facing the controller slightly lubed with vaseline tightly to the front of the controller. The vaseline ensures that the epoxy does not bound to the acrylic. It is important that there is absolutely no space in between the acrylic and the front of the controller—and to ensure this I filed down the edges of the perforation.
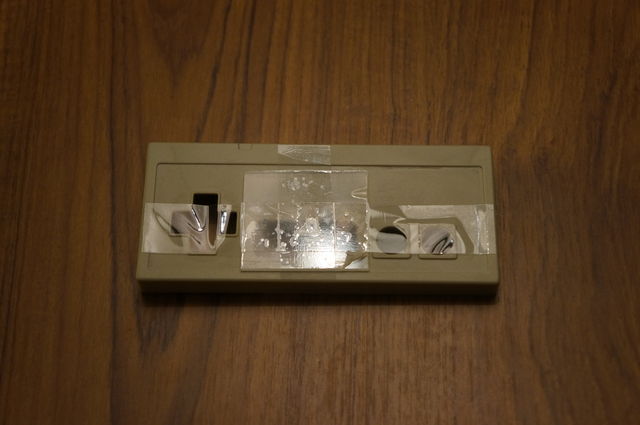
The last step in filling the hole is to mix some epoxy and applying it to the back side of the controllers front. I made the layer of epoxy approximately the same thickness as the plastic surrounding it. I let the epoxy cure for about 24 hours before sanding the edges to get a smooth surface.
Modifications to the electronics
The electronics in an Atari compatible joystick is dead simple, 5 V is provided by the port and each button has its own pin. All that has to be done is to connect switches between 5 V and the corresponding button pins.
I started by desoldering all components on the PCB—both surface mounted and through-hole. All that is going to be used is the switches, and they are part of the board itself. As you can se in the picture below, the components are still there because I forgot to take a photo of the board without the components :)
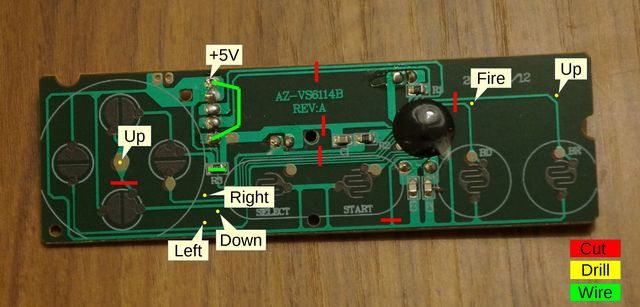 PCB modifications.
After desoldering, I cut traces on the board and started planning where to connect the wires. The yellow dots in the photo are places where I drilled small holes for the wires.
The hardest part is soldering the wires to the tiny traces. Fist off, the copper in the traces has to be exposed. I achieved this by very gentlty scraping of the lacquer and then brushing on some flux. I soldered the wires at a as low temperature as possible to prevent the tiny traces to come off the board. Whenever I completed one solder joint, I covered it in hot glue right away to prevent any unnessecary strain on it.
New front panel
By now the gamepad is fully functional, but it is not looking very nice. I want to add a contemporary, non-NES looking front panel.
I started off with scanning the original front panel and then measuring it so that I could scale it properly in Inkscape. After this step the rest of the design was simple; just draw the outlines in 50% opacy to get the correct dimensions for the new panel.
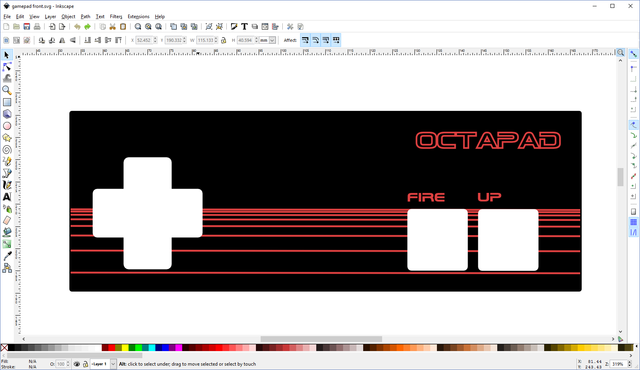 Front panel design in Inkscape.
Exactly how I went from the design to a finished front panel is a subject for a future post on my updated front panel process. Stay tuned for more on this.
Result
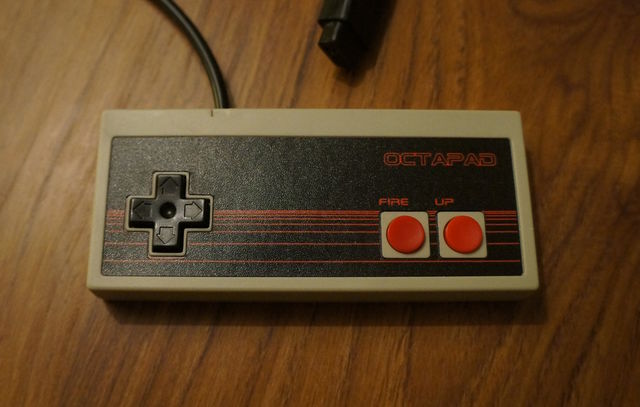
I like how this project turned out—using the gamepad really feels like second nature and I like the looks aswell. This is the gamepad was looking for.
Comments