Professional looking front panels
I like it when a DIY project has that extra touch or finish that makes it stand out and hard to separate from a professional product. Front panels are one of those things that are quite hard to create in a professional manner. I have found a couple of guides on the internet on how to make DIY front panels, none of which demonstrates a method that, in my view, produces satisfactory results.
Professional plastic overlays
Professionally made plastic overlays comes in different shapes and materials, and can be found on almost every thinkable device with a control panel. They can be made of a number of materials including polycarbonate, polyester, PVC and vinyl. Plastic overlays often have features such as indicator windows for LEDs and displays, cut-outs and embossed areas for buttons.
Professional overlays are both expensive and impractical for hobbyists, who rapidly wants to be able to create prototypes in small numbers without spending a fortune in the process.
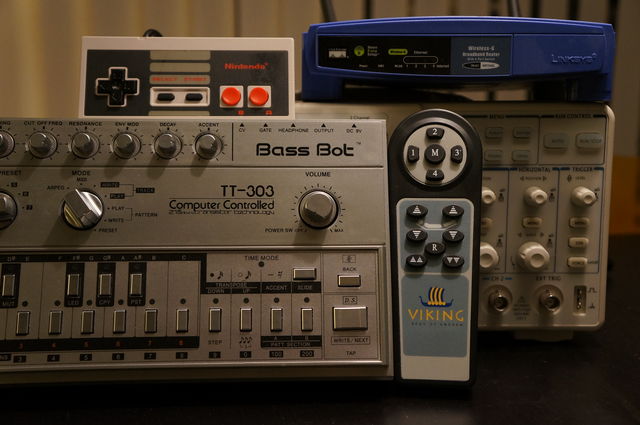
The hobbyist needs
What I need as a hobbyist is a way to create plastic overlays using a computer, printer and readily available items. I want to be able to make overlays which can have different shapes, be resistant to moisture, and if possible feature transparent indicator and display windows. It is important that the end result is hard to distinguish from a professionally made panel, both by judging looks and feel.
My idea
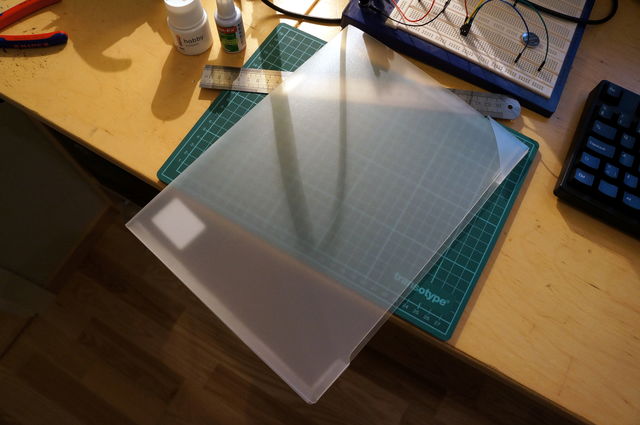
The idea came to me in a local office supply store, where I picked up a transparent folder and realised that it had the same texture and feel to it as a professional plastic overlay. I thought that if I could glue it to a printout I would essentially have a way to produce my own overlays—and bought one to perform some tests.
Trial and error
Eager to put my idea to the test, I quickly designed and printed out a test design on my laser printer, cut a piece of plastic from the folder and started to mix some epoxy glue. I let the epoxy cure for 24 hours under the pressure from a heavy book. Upon investigating the results, I discovered that the epoxy only bounded with the paper and not the piece of the plastic folder—what a letdown. When I was about to clean up my desk and throw away my failed experiment I scratched the surface where the piece of plastic had been—It had the same look and feel as the plastic piece from the folder!
Epoxy glue mould
What I first considered a failed experiment, had produced a layer of transparent epoxy strongly bounded to the printout with a negative imprint of the folders texture. My piece of plastic had acted as a form of glue mould. Not bad, but it was far from perfect; the colour of the epoxy was somewhat milky in a few areas, there were some air bubbles and the white colour of the paper had turn semi-transparent (like when you get an oil stain on paper). I repeated the process a few times to address the problems and I was able to eliminate the colour problem by painting with correction-fluid on the back side, but the problems with the milkyness and bubbles persisted.
Attachment with heat
Tired of handling epoxy, I moved on to find other means to bind my piece of plastic to the folder, which I by then knew by the name Polypropylene. Polypropylene is apparently notoriously un-glueable and it is common to bind it using heat. No wonder epoxy couldn't bind it!
I tried to put a piece of my beloved polypropylene at the bottom, the printout in the middle and a piece of cloth at the top. I then fired up my iron and briefly heated the cloth. The result wasn't pretty. The plastic had been bent and the paper had wrinkles on it, but the paper was bound to the plastic.
Attachment with spray mount
I got the idea to test spray mount glue due to its stickyness, it is similar to glues used in magazines, and seems to stay sticky indefinitely. I sprayed a printout with a thick coat of 3M's Scotch Weld 77, applied a polypropylene piece and pressed the pieces together for a while. The result looked great when the background of the printout were light, but not so good with darker backgrounds as the colour depth became uneven. Not good enough.
Super glue mould
Somewhat exhausted from all my experimenting and recent failure with the heating iron, I decided to go down the glue moulding path once more. Super glue was the first thing that came to mind as it would be a quick test due to its rapid curing time. The result was impressive. The super glue had formed a perfectly transparent layer with a negative imprint of the polypropylene moulds (here on after referred to as PP mould) surface tightly bounded to the printout. Finally some real progress! As with the epoxy, the white colour of the printout became semi-transparent but a thin layer of correction-fluid on the back side sorted that out. One thing still remained; I wanted to be able to have transparent window areas.
Using laser printer transparency film to print my design felt like a winning concept at that point, it would enable me to leave out transparent areas for LEDs and displays. Super glue cures in contact with moisture contained either in the air or the item to be glued. There was no moisture in between the PP mould and the transparency film, and after 24 hours the glue still hadn't cured. Having noted that glue turned paper more transparent, I did an internet search and found out about transparent paper, or tracing paper—figuring that glue might make it even more transparent, I got some and tried again. The results turned out really good for small LED windows but not for displays as the windows were diffused. I'll have to live with making cut outs for displays, but this is looking really good!
Happy about my recent progress, I brought some transparent paper with me and printed a design on a colour laser printer that I have access to. When I applied the super glue, the toner came off and started to bleed. It looked like garbage! Desperately trying to make the toner stay, I sprayed some protective plastic spray for PCBs that I had lying around on the printout before applying super glue. There was less toner bleed than before, so I tried once more applying two layers of plastic spray before giving it another go. This time there was almost no bleed and three layers of plastic spray eliminated the problem! Sadly a new problem was introduced; the super glue detaches fairly easy from the plastic layer underneath.
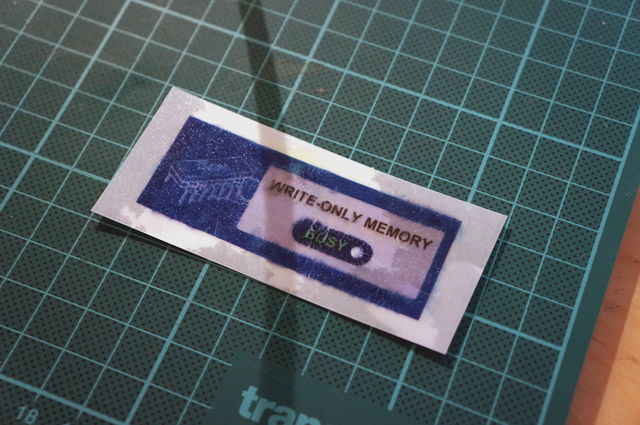 Toner bleed caused by super glue.
I slept on the problem, and came up with the idea to print a mirror image of the design on the transparent paper, enabling the super glue to be applied to the opposite side of the printer toner. The result was less sharp and the colours slightly uneven—OK, but not exactly professional looking.
Epoxy glue mould, again
Feeling a bit downcast from the fact that the super glue method stumbled right at the finish line, I wanted to test if epoxy would have the same devastating effect on colour printer toner. Epoxy did not make the toner bleed—there was still hope! As usual, happiness don't last long, and upon closer inspection of the results I discovered that the epoxy reacted so little with the toner that it didn't even adhere to it. As a result the cured epoxy layer was easy to remove from the printed design.
Remembering my trick to print a mirror image design on transparent paper, I figured it would be possible to try it using transparency film this time as epoxy doesn't need moisture to cure. Yes! It worked, the epoxy adhered nicely to the non-toner side of the film. I went ahead and applied correction fluid to the back (toner side). When the correction fluid had dried, I discovered that the correction fluid had reacted with the toner in such a way that the toner had lost its bound with the transparency film. The toner and correction fluid was all too easy to peel off.
The correction fluid I was using contains a hydrocarbon solvent, and I suspected that this was causing the undesired effect as colour toner contains hydrocarbons. In search of a alternative white background colour I bought an eco friendly, water based correction fluid and a water based acrylic hobby paint. As I suspected both water based colours worked fine and didn't make the toner loose it's bound with the film. All I had to do next was to apply a double adhesive sheet and cut out the panel! Success!
Left over from my first try with epoxy glue are the problems with air bubbles and milkyness. A little googling on epoxy mixing suggests that mixing the epoxy components slow and gently reduces the amount of air bubbles in the epoxy—something that I can verify. This time I didn't experience the patchy milkyness of the epoxy. My theory is that I used a thicker layer of epoxy in the beginning, and that it wasn't equally spread out over the surface.
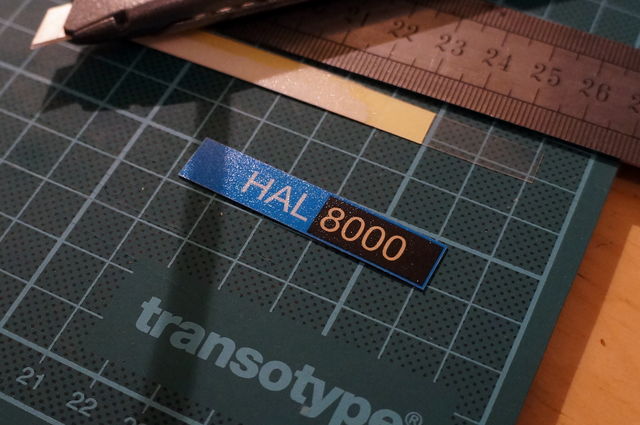
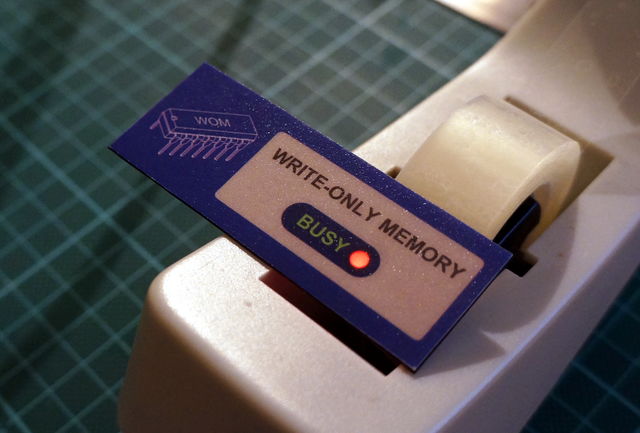 The result of the epoxy glue mould process. Note the LED indicator window!
Result
I find it satisfying to present a DIY method of producing professionally looking plastic overlays for front panels—using nothing but readily available items. It should also be added that it's not only the looks that pass as professional, the panels feel professional to the touch as well.
Downsides to this method include the fact that it is somewhat time consuming due to epoxy curing times and that epoxy hardener is nasty stuff and thus requires special care.
Areas for improvement
I currently find it hard to avoid air bubbles when making panels with larger areas than approximately 30 cm². Maybe one can construct some form of template or contraption to address the problem.
It would be interesting to try this method using epoxy resin instead of epoxy glue as it is less viscous. I imagine it to scale better to large surfaces.
Try it!
If you end up trying this method of producing DIY front panels, bear in mind that it is by no means a finished process—I consider it a work still in progress and would love to receive feedback. Please feel free to comment or contact me if you have ideas, experiences or feedback to share, or if you just have questions!
The epoxy glue method
This section describes how to replicate my results using the epoxy glue method.
First, a word of caution: epoxy hardener is toxic and should be handled with care! I use gloves and a well ventilated area at all times when handling uncured epoxy.
Bill of materials
- A polypropylene folder.
- Transparency film for laser printers.
- Water based correction fluid or water based white acrylic hobby paint.
- Epoxy glue with long curing time.
- A Double-sided adhesive sheet.
Step by step
- Flip the design horizontally (mirror image) in your design software.
- Print out the design using a laser printer. Use laser transparency film.
- Sand the non-toner side gently using super fine sandpaper (I used P1200) and clean away any residue.
- Cut out the panel design from the transparency film. Leave some margin.
- Place the design with the toner side facing down on a couple of regular printer paper to protect your work area.
- Cut out a piece of plastic from a polypropylene (PP) folder. The piece should be larger than the design.
- Mix some long curing time epoxy in proportions according to the manufacturers instructions. Mix slowly to avoid air bubbles as much as possible.
- Apply epoxy to the design in such a manner that it will cover the design when sandwiched in between the film and PP mold.
- Put the PP mould on top of the epoxy glue. Avoid air bubbles by bending the plastic slightly, lower the center into the epoxy and then slowly flatten it. Push away any air bubbles towards the edges.
- Apply pressure evenly by placing a heavy object with a flat bottom on top.
- Wait for the epoxy glue to set (20 hours in my case). Curing times may differ between brands.
- Loosen the PP mould from the panel.
- Paint the back side with correction fluid or white hobby paint (water based) - obviously avoiding any window areas. I used a piece of a sponge for applying the paint.
- Wait for the paint to dry.
- Apply the double-sided adhesive to the painted side.
- Cut out the finished overlay. I used a box cutter with a fresh blade, and a steel ruler for guidance.
Comments
Eric
If you want to remove air bubbles from panel you must after mixing epoxy use vaccum container for food, this should help.
Kevin Thomasson
Thanks, one food vacuum container inbound. Looking forward to test it!
Karl W Beistline
Have you tried clear fiberglass resin and clear hardener (auto parts store), instead of epoxy? The cure time can be reduced by carefully adding 1 - 5 extra drops of hardener to the resin. Mix carefully, as to not form large bubbles. Apply using your same application technique. *Caveat* - Fiberglass resin remains 98% translucent when thin (ie. less than .5mm), and gradually becomes frosted amber in color as resin thickness is increased (ie. thicker than 1mm). It is rigid and breaks easily when bent after curing. A textured user surface can be accomplished using various polypropylene mould textures (ie. smooth to heavy texture). I have not tried using FR directly on toner or inkjet ink ( non reversed image). Just an Idea...
Kevin Thomasson
No, I haven't tried fiberglass resin ... yet. But I definitely will try it now knowing that there is such a thing. :)
Daniel
My solution, which I use for my 4BX touch-remote overlays, is to laser-print the button legends on a sheet of laser-printable self-adhesive plastic (I think it's polypropylene, though the packet doesn't list the plastic type), then cold-laminate (using a conventional laminator with the heater not activated) a second transparent sheet of the printable self-adhesive film over the top, to protect the printing from wear as the buttons are frequently touched. The main difficulty is getting a wrinkle-free cold lamination. But by printing multiple copies of the overlay on an A4 sheet, and taking great care when feeding the film pair into the laminator, I usually get about 50% of them wrinkle-free and thus usable.
Gene
I think there is no such thing as a "fiberglass resin". What is sold in auto parts store is usually a polyester resin used together with fiberglass cloth or mat. Of course it can be used on it's own. Please read the safety precautions before working with polyester resin.